APP
PYTHON TOOLS
InteractiveChecklists is an Android application for viewing and interacting with Markdown and PDF checklists. It is built with Jetpack Compose and follows an MVVM-style architecture. It is designed to be extensible with an interactive aviation map featuring live DCS data integration, tactical markers, and dynamic route and pattern calculation. Runway heading–based approach visualization and real-time map updates enable enhanced situational awareness during flight operations.
Development status: This repository is a development version and not an official release. The app is functional but under active development and may contain experimental features.
Note: A preview APK for version 1.1 is planned. If you are not familiar with Android Studio or building apps from source, please wait for the official preview release to test the app.
Table of Contents
- Features
- Screenshots
- Demo Videos
- Installation
- System Requirements
- How to Build & Run
- Key Components
- Contributing
- Support & Contact
- FAQ
- Acknowledgements & Credits
- License
-
Unified File System: Manage files from bundled assets and internal storage in a single hierarchical view.
-
Multilanguage Support: The app supports English, Spanish and German. You can switch the language in the Settings menu. All UI text is available in English.
-
Multi-Tab System: Open multiple documents (MD/PDF) with a scrollable tab bar, quick tab switcher, swipe navigation, and tab persistence.
-
PDF Viewer: PDF viewer with annotations (draw/highlight/erase), pinch-to-zoom, page snapping, and color inversion.
-
Interactive Markdown Checklists: Stateful checkboxes and collapsible sections for interactive checklists.
-
Tagging System: Assign tags to files for filtering and organization.
-
QuickNotes: Persistent notes powered by Room, with search, autosave, and markdown support.
-
Data Persistence: Stores user preferences, annotations, shortcuts, tags, and open tabs locally.
-
Aviation Map (experimental): OpenStreetMap-based map viewer with live aircraft position tracking from the DataPad stream. Adds a
MapViewertab showing aircraft position, heading, altitude and basic overlays — see docs/EN/features/AVIATION_MAP_FEATURE.md for details and configuration. -
DataPad (experimental): Live flight telemetry display (UDP) for DCS World. Streams aircraft telemetry to the app for realtime status and popup details — see docs/EN/features/DATAPAD_FEATURE.md for full details and setup instructions.
-
Tactical Units Tracking (experimental): Live tactical unit markers (aircraft, helicopter, ground, ship) on the map with real-time updates. Marker popups include "Last seen" timestamps and refresh snippets with speed/altitude. A "Live Units Only" filter (shows units seen in the last 10s) is synchronized between the list and the map. See docs/EN/features/TACTICAL_UNITS_TRACKING.md and scripts/DCS-SCRIPTS-FOLDER-Experimental/README_ENTITY_TRACKING.md for setup and details.
-
MapDatabaseTools (Python): A collection of Python utilities for receiving, decrypting (AES-GCM), and visualizing DCS flight telemetry. Includes a PySide6 GUI with an embedded OpenStreetMap/Leaflet map for live aircraft tracking, a marker database, and helper scripts to manage map assets. See
scripts/MapDatabaseTools/README.mdfor usage and configuration. -
Supported maps (marker DB):
| Map | Status | Notes |
|---|---|---|
| Caucasus | Supported | Marker set available in DB |
| Marianas | Supported | Marker set available in DB |
| Germany (CW) | mostly Supported | Marker addition in progress |
Planned features and long-term improvements are tracked in the Roadmap document.
Copy export.lua from
scripts/DCS-SCRIPTS-FOLDER-Experimental
into your DCS scripts folder, for example:
%USERPROFILE%\Saved Games\DCS\Scripts\
This script enables DCS to write entity batches and player telemetry files into a subfolder that the Python forwarder reads.
After copying:
- Start or reload your mission, or
- Restart DCS
to activate the export script.
The Python forwarder (DataPad Server) requires a **local Python installation
- On Windows, installing Python via the Microsoft Store (Python 3.12) is recommended for simplicity.
- The included
install.bat:- Creates a virtual environment (venv)
- Installs all required Python packages into that environment
This keeps dependencies isolated and clean.
- To update or reinstall packages: re-run
install.bat - To remove everything: delete the created
venvfolder
-
Navigate to the folder:
/DCS-SCRIPTS-FOLDER-Experimental -
One-time setup – double-click:
install.bat
→ Wait 1–2 minutes while required packages are installed
(only needed once or when updating packages) -
Start the server – double-click:
run.bat
→ A small console window / menu will open

DataPad server launcher with configuration menu
- Enter the Server IP address, Target IP(s), and enable PoW (recommended)
- Configure this via the Settings menu by pressing [S]
- Or edit the auto-generated
server_config.jsonlocated next tostart.bat
- Server IP address
→ IP of the PC where DCS is running - Target IPs
→ Android devices (tablet or smartphone) in your Wi-Fi network - You can:
- Enter each target IP individually, or
- Allow all devices in your network using
.*at the end of the IP address- Example:
192.168.1.*
- Example:
- Press Enter to confirm the settings
- Select the server mode using the arrow keys
- Recommended: ECDH with App + PoW
- Easiest to set up
- Secure and safe for automatic pairing
- Recommended: ECDH with App + PoW
- Press Enter to start the server

DataPad server QR-code generation for authorized_devices.json
- In the server window:
- Press B within 5 seconds → A QR code will be displayed automatically
- (Optional) You can also configure IP/port manually

Activates the in App datapad functions
- Open the Android app
- Go to Settings → DataPad
- Turn DataPad ON

Settings Menu for datapad
- Open the DataPad Popup using the FAB button
- Tap Settings in the DataPad Popup

Enter your Device Name
- Enter a Device name

Enter your Server IP and Scan QR-Code
- Scroll down set your ServerIP (recommend) then to QR-Code setup | or for Manual adding, copy Device Name, ID and Public Key and enter as new entry in authorized_devices.json
- Tap Scan QR Code
- Scan the QR code displayed on your PC screen
- (First time only – securely registers your device)
- Enable the toggle button in the DataPad Popup
- If the correct server is selected, a heartbeat is sent every 30 seconds
-
When a DCS mission starts and you are seated in an aircraft, the forwarder (DataPad Server) begins sending live data to the app
-
The current status is shown in the top info bar:
- 🔴 Red – No incoming data / No mission running
- 🟡 Yellow – Mission running, but not in an aircraft / No active live data
- 🟢 Green – In an aircraft and receiving telemetry and/or tactical unit live data
Some DCS files may be blocked by Group Policy or antivirus software.
This can prevent correct operation.
- Press the Windows key and type
PowerShell - Right-click Windows PowerShell → Run as Administrator
- To unblock a single file, enter:
Unblock-File "C:\Program Files\Eagle Dynamics\DCS World\bin\lua-dxgui.dll"


4. Press **Enter**

### To Unblock All DLL Files at Once

```powershell
Get-ChildItem "C:\Program Files\Eagle Dynamics\DCS World\bin\*.dll" | Unblock-File
Press Enter.
If unblocking does not help:
- Open DCS Launcher
- Go to Settings (gear icon)
- Click Repair
- Wait for the process to complete
This will restore and unblock all affected files.
✅ Done! The app should now receive live telemetry and tactical data from DCS.
- Connection is encrypted (AES-256 + ECDH handshake) – similar to secure websites
- Only registered devices can connect (via QR code or manual list)
- First connection is remembered (Trust on First Use) → protects against fake servers later
- Optional extra protection: Proof-of-Work (anti-spam) – can be turned on in
run.batmenu if needed
For most users the QR code method is secure enough and very simple.
If you don't use Windows or want full control:
cd scripts/DCS-SCRIPTS-FOLDER-Experimental
python -m venv venv
source venv/bin/activate          # Linux/macOS
# or on Windows: venv\Scripts\activate
pip install -r requirements.txt
python forward_parsed_udp.py --authorized-devices authorized_devices.json --host YOUR_PC_IP --port 5010
Entity Contacts (tactical units): Enable Entity Tracking and run the forwarder with entity tracking enabled to receive live markers; see scripts/DCS-SCRIPTS-FOLDER-Experimental/README_ENTITY_TRACKING.md and docs/EN/features/TACTICAL_UNITS_TRACKING.md.
See docs/EN/features/DATAPAD_FEATURE.md for full usage, configuration, and troubleshooting.
Phase 1 (experimental): This is Phase 1 of DataPad — future phases will add more telemetry, visualizations, and security improvements.
Next up: 2-way communication (experimental) to enable data flow back to DCS.

File explorer showing the hierarchical file and folder structure

Interactive Markdown checklist with stateful checkboxes

PDF viewer with drawing, highlighting and annotation capabilities

QuickNotes editor with markdown support and autosave

Landing pattern calculator displaying flight path calculations

Early ATC features showing airspace visualization

AA range rings visualization

Live tactical markers displaying real-time unit positions

Flight path tracking overlay on the aviation map

Route planning with labeled waypoints and flight paths

Route planner interface with live preview

Landing route creation sheet with configuration options

DataPad displaying live aircraft telemetry from DCS World

Application settings and configuration panel
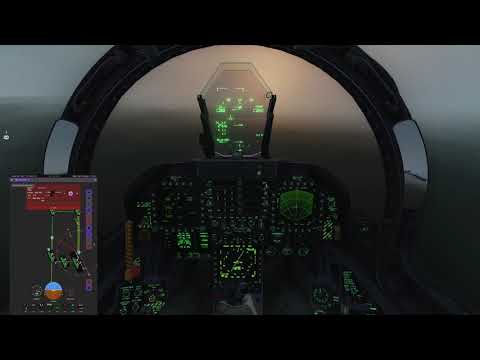
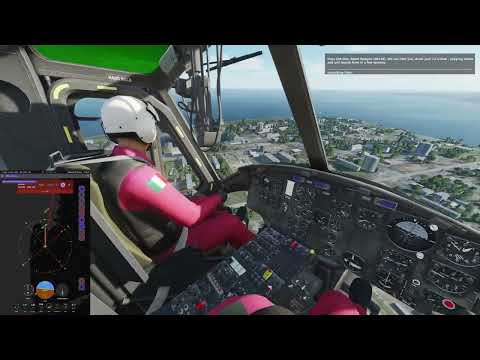
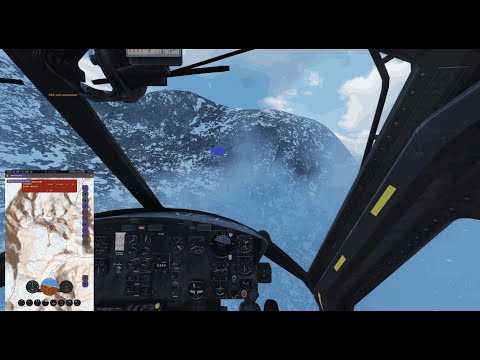
📝 NOTE
This is a test recording to evaluate recording performance, tablet capture workflow, resolution settings, and overall system stability during DCS gameplay. Mission content and pacing are deliberately simple and functional.
Step-by-step instructions to get the project running locally.
-
Prerequisites
- Install Android Studio (Arctic Fox or later recommended).
- Install a compatible JDK (Java 11 or later recommended).
- Configure Android SDK and at least one emulator or use a physical device.
- For Python forwarder scripts (optional): install
qrcodeand cryptography dependencies:pip install qrcode[pil] cryptography cffi(use a virtual environment to avoid system conflicts).
-
Clone the repository
git clone https://github.com/arn-c0de/InteractiveChecklists.git
cd InteractiveChecklists- Build with Gradle (command-line)
./gradlew assembleDebug- Open in Android Studio
- Open the
InteractiveChecklistsdirectory in Android Studio. - Let Gradle sync and allow Android Studio to download any missing SDK components.
- Run the app on an emulator or connected device.
- Open the
- Supported OS: Windows, macOS, Linux (for development).
- Android Studio: Arctic Fox or newer recommended.
- JDK: Java 11+ recommended.
- Android SDK: API level corresponding to the project's
compileSdkandtargetSdk(seebuild.gradle.kts).
- From Android Studio: Open the project, wait for Gradle to finish syncing, then select a target device and click Run.
- From the command line:
./gradlew assembleDebugbuilds an APK; use./gradlew installDebugto install on a connected device.
We welcome contributions. For guidelines, issue workflow, and coding standards, see COLLABORATORS.md.
Quick contribution ideas:
- Improve documentation or add examples.
- Add or extend tests.
- Fix small UI/UX bugs or accessibility issues.
For larger or breaking changes, please open an issue first to discuss design and scope.
If you encounter issues or have questions:
- Open an issue in this repository.
- For security-sensitive issues, please follow the instructions in SECURITY.md.
- For contribution coordination and discussions, see COLLABORATORS.md.
When reporting a bug, please include a screenshot if possible.
Use the screenshot to mark or highlight the exact area where the issue occurs, and briefly describe what is shown and what is wrong in that location.
- Q: How do I run tests?
- A: There are unit tests under
app/src/test. Run them via./gradlew test.
- A: There are unit tests under
- Q: What is the license?
- A: This project is licensed under CC-BY-NC-SA 4.0. See the
LICENSEfile for details.
- A: This project is licensed under CC-BY-NC-SA 4.0. See the
- Q: Where is the documentation?
- A: See the
docs/folder or the Documentation index.
- A: See the
Thanks to all contributors and to the Jetpack Compose and Android open-source ecosystems used in this project.
This project is licensed under the terms in the LICENSE file (CC BY-NC-SA 4.0).