Example_Light3
It's nature that different choices lead to different results. It's our first task to follow this schedule (below). Even a proficient programmer may take half an hour to implement such schedule by using native Arduino C++ langue. However, ArControl makes things easier. Through a user-friendly GUI, there is no need to master any script language.
Sequent events of Light3 task. You will get Yellow Ligth (4sec) Green Ligth (3 sec) or Red Ligth (2 sec), depending on the your choice of Left, Right or Wait.
The schedule can be decomposed to a form named State Machine (below).
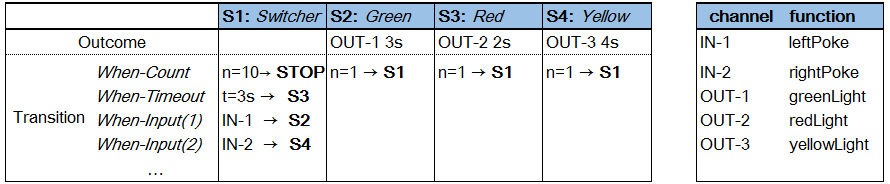
A form of State Machine for Light3 task. Besides, an extra restraint ("max loop = 10 -> Exit Session") is added.
The form can be fulfilled in ArControl Designer as figure below. This demo has been embeded in release version in ArControl Designer> File > Open in > Light3, but need to be resaved when you use it for the first time.
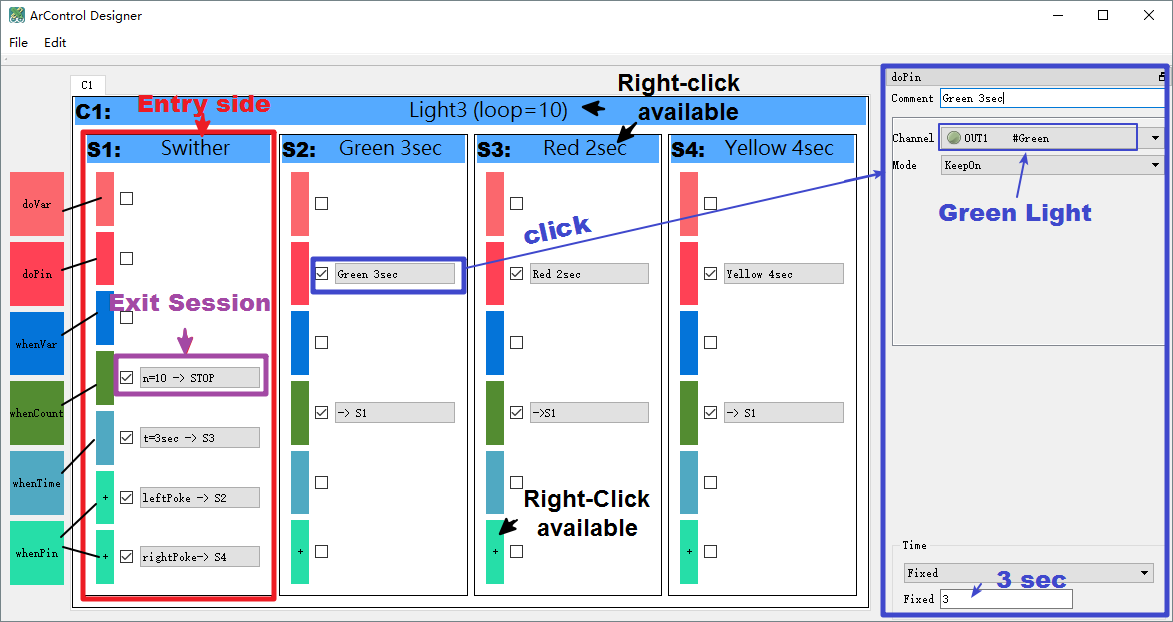
Light3 schedule is decomposed with ArControl Designer.
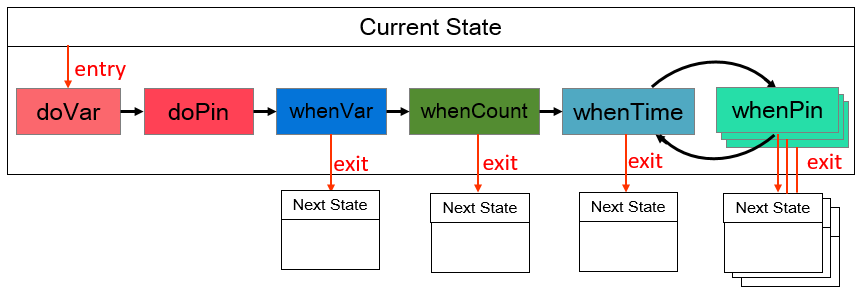
Priority ranks (sequences) of
doXXXandwhenXXX. Items inwhenPinare in equal priorities.
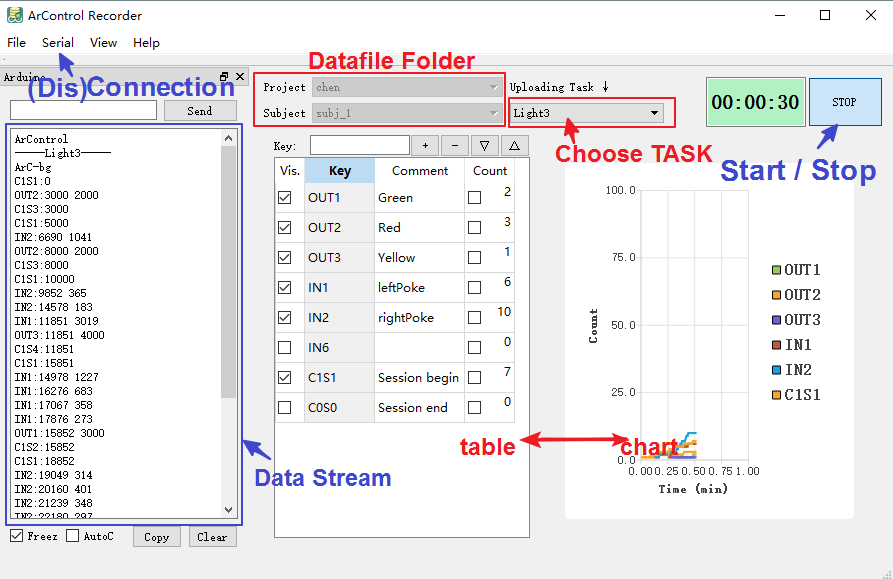
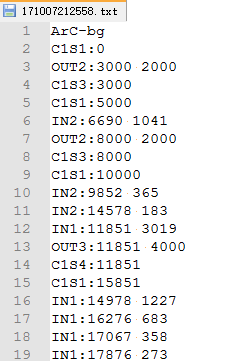
Run a "Light3" task. Data was viewed as log in "Data Stream" pannel, as table in middle pannel, as chart in right pannel, and was collected to data file under "Datafile Folder".
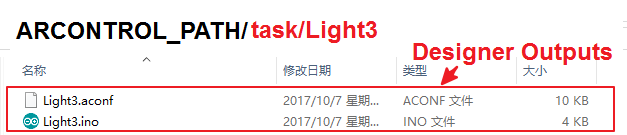
The ArControl Designer saved the previous Light3 layout as Light3.aconf, and automaticaly generated executable Light3.ino. You should NOT modify these files, as they are already complete.

The ArControl Recorder automatically saved the log to data file. You can use my Matlab function BF_arc2mat.m to convert the file from TXT to MAT.