A G-code follower that reacts to comments injected into G-code. It monitors jobs, parses handler calls from G-code and runs utility handlers. Handlers may run asynchronously or synchronously depending on your use-case.
- Async handlers (
; PCE:) run in the background and do not block the printer. - Sync handlers (
; PCE-WAIT:) are intended to be paired with an M0 so the printer pauses; the handler verifies conditions and the script resumes the print via PrusaConnect (other wait codes could be supported as well).
It ships with handlers for:
- Checking that you got the correct build plate (based on AprilTags)
- Checking that your build plate is actually empty (based on a vision model)
- Taking timelapse pictures
- Monitors a PrusaConnect printer for new jobs.
- Downloads
.bgcodefiles and converts them to.gcode. - Listens to metrics from the printer to know the position in the gcode file.
- Emulates firmware bugs in Prusa Marlin to exactly match the printer.
- Parses G-code with comments
PCE(async) orPCE-WAIT(sync). - Calls the handler at the right time.
- For sync commands it resumes print if the handler returned success (via PrusaConnect API)
- You can manually continue the print in PrusaConnect or at the printer.
- Camera images are fetched locally via RTSP (if possible) or alternatively downloaded from PrusaConnect
- It can read printer logs via syslog (currently not used in any handler).
- PrusaConnect printer with at least one connected camera
- Script needs to run in the same network as the printer
- UV package manager installed (
uv)
Login to your PrusaConnect account:
uv run prusactl auth loginFind out the uuid of your printer:
uv run prusactl printersRun the script:
uv run main.py your-printer-uuidThe script continuously monitors for new jobs, follows G-Code and runs handlers.
This handler ensures the correct build plate sheet is loaded before printing on a PrusaConnect printer. It uses AprilTag markers printed on sheets to validate the material before resuming a paused print.
Put a marker on your print sheets:

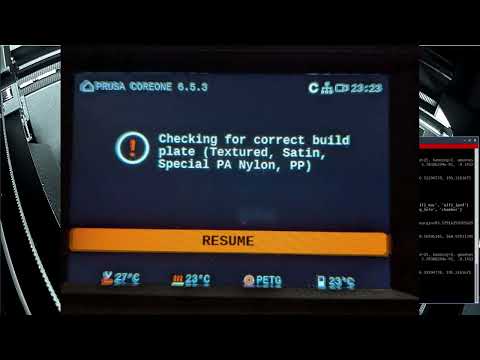
After print start the printer will stop for detection:

You can locally overwrite the detection (press resume on the LCD) or click on Prusa Connect:

See it in action:
Add this to "Start G-code" in PrusaSlicer right after G28:
G28 ; home all without mesh bed level

; Start build plate check
G1 X242 Y220 Z100
; Based on https://help.prusa3d.com/filament-material-guide
{if filament_type[0] =~ /.*(PLA|HIPS).*/}
; PCE-WAIT: check_build_plate(allowed_build_plates=(0, 1, 2), check_empty=True)
M0 Check for correct build plate (Textured, Smooth PEI, Satin)
{elsif filament_type[0] =~ /.*(PETG).*/}
; PCE-WAIT: check_build_plate(allowed_build_plates=(0, 2, 4), check_empty=True)
M0 Check for correct build plate (Textured, Satin, PP)
{elsif filament_type[0] =~ /.*(ASA|ABS|PC).*/}
; PCE-WAIT: check_build_plate(allowed_build_plates=(2, 4), check_empty=True)
M0 Check for correct build plate (Satin, PP)
{elsif filament_type[0] =~ /.*(PVA|BVOH).*/}
; PCE-WAIT: check_build_plate(allowed_build_plates=(0, 1, 2, 4), check_empty=True)
M0 Check for correct build plate (Textured, Smooth PEI, Satin, PP)
{elsif filament_type[0] =~ /.*(PP).*/}
; PCE-WAIT: check_build_plate(allowed_build_plates=(4,), check_empty=True)
M0 Check for correct build plate (PP)
{elsif filament_type[0] =~ /.*(FLEX).*/}
; PCE-WAIT: check_build_plate(allowed_build_plates=(0, 4), check_empty=True)
M0 Check for correct build plate (Textured, PP)
{elsif filament_type[0] =~ /.*(PVB).*/}
; PCE-WAIT: check_build_plate(allowed_build_plates=(1, 2, 4), check_empty=True)
M0 Check for correct build plate (Smooth PEI, Satin, PP)
{else}
M0 Check for correct build plate manually!
{endif}
; End build plate check
(This example will also enable empty print sheet detection. Set check_empty=False if you do not want that.)
- Allowed sheet IDs are automatically set based on filament type.
- Ensure the corresponding AprilTag is on the correct sheet.
| ID | Sheet |
|---|---|
| 0 | Textured |
| 1 | Smooth PEI |
| 2 | Satin |
| 3 | Special PA Nylon |
| 4 | PP |
Codes for detection:

Those print at 10x10mm (300dpi). Those can be also printed larger or smaller depending on your camera setup. I put them on the back of the sheet as the front of the sheet is too bright on my camera. The location in the picture does not matter. It is recommended to print this on temperature resistant material (i.e white PET stickers with a laser printer).
- Tested on Prusa Core One (let me know if it works on other printers)
- There currently seems no way to push a better message to Prusa Connect (M117 does not work on xBuddy and the message of M0 is lost)
- There is a delay of up to 10s due to the snapshot interval if you get them from PrusaConnect. Does not apply when they can be fetched via RTSP locally.
- We cannot move the bed down conditionally (i.e. only if the bed does not match)
- We cannot show messages conditionally (i.e. show: "The sheet does not match").
- We cannot send conditional messages to Prusa Connect (i.e. send a push or move the printer to ATTENTION state when the sheet does not match)
This handler prevents printing over a previous finished job by verifying the build plate is clear. It uses a computer vision model (EfficientNetV2) trained to distinguish between an empty sheet and one containing printed objects or debris.
The vision model analyzes the camera feed to ensure a clean start.
If an object is detected, the printer will remain paused at the M0 command. Once the user clears the bed, they can resume the print via the LCD or PrusaConnect (or wait until the model figures that out).
You can trigger the empty check standalone or as part of the check_build_plate command. Add this to your "Start G-code":
Standalone Sync Check (Blocks until empty):
; Move to a position where the camera has a clear view
G1 X125 Y100 Z150
; PCE-WAIT: check_empty_plate(check_empty=True)
M0 Clear the build plate!
Combined with AprilTag Check:
; PCE-WAIT: check_build_plate(allowed_build_plates=(0, 1, 2), check_empty=True)
M0 Check build plate and ensure it is empty
- Sync mode (
PCE-WAIT): The script will wait for a "Clear" signal from the model before automatically sending the resume command to PrusaConnect. - Async mode (
PCE): Runs the check in the background. Useful for logging or remote notifications without stopping the printer.
It is recommended to use the example from the previous handler and use them in tandem.
- Image Capture: The script captures a frame from the RTSP stream or PrusaConnect.
- Preprocessing: The image is cropped and normalized for the neural network.
- Inference: The EfficientNetV2 model outputs a probability score.
- Validation: If the score exceeds the "Empty" threshold, the handler returns success; otherwise, it keeps the script in a waiting state.
- Camera Angle: The model performs best when the camera has a top-down or high-angle view of the entire build area as that is how I trained it. However, it is easy to retrain (5 minutes of training time on a modern CPU) if your camera is different. You need at least 30 empty and 30 debris pictures (more is better).
This handler captures snapshots during the print to create high-quality timelapses. It supports both asynchronous captures for zero impact on print time and synchronous captures for professional-grade stability and consistency.
The script organizes frames by job ID, allowing you to easily compile them into a video after the print finishes:
- Async Mode (
PCE): The snapshot is triggered in the background while the printer continues to move. This is the fastest method and adds no time to your print, but may result in "motion blur" or the toolhead appearing in different positions. - Sync Mode (
PCE-WAIT): Pair this with anM0command. The printer will move to a specific position and wait until the frame is successfully stored before resuming. This ensures the toolhead is in the exact same spot for every frame, creating a "stabilized" look.
To capture a frame at every layer change, add one of the following to your "After layer change G-code" section:
Consistent/Stabilized (Sync):
; Move head out of the way for a clean shot
G1 X240 Y210
; PCE-WAIT: timelapse_snapshot()
M0 Capturing timelapse frame
This will add significant time to your print but yields the best result.
Fast/Background (Async):
; PCE: timelapse_snapshot()This will technically execute with the following G-Code. You can also combine it with a move (as above) to move the gantry out of the way.
Snapshots are stored locally on the host machine running the script, organized by printer and job:
timelapse/
└── <your-printer-uuid>/
    └── <job-id>/
        ├── timelapse_0.jpg
        ├── timelapse_1.jpg
        └── ...
- Network Latency: In Async mode, there is a small delay between the G-code command and the actual image capture.
- Video Assembly: This handler currently captures raw frames only; you will need to use a tool like
ffmpegto compile the.jpgfiles into an.mp4video. - Gantry Location: The default camera position on the Core One is obstructed by the gantry if it is in the front. If you do not move the gantry back with an extra G-Code parts of your frames will be obstructed.
Unlock the full potential of your 3D printer by connecting it to your entire ecosystem. Beyond the built-in vision and tracking tools, PrusaConnect Essentials is designed as an extensible platform, allowing you to trigger custom Python logic directly from your G-code.
Whether you want to blink your office lights when a print finishes or enforce safety protocols based on external sensors, the architecture is ready for your ideas.
By leveraging custom handlers, you can bridge the gap between your slicer and your smart home:
- Environmental Safety: Automatically pause or cancel ABS/ASA prints if a window sensor detects the exhaust vent is closed.
- Smart Notifications: Send high-priority alerts to Home Assistant, Telegram, or Discord when specific G-code milestones are reached or things are not as expected.
- Hardware Control: Toggle external enclosures, HEPA filters, or secondary cooling fans via WiFi relays (like Shelly or Sonoff).
- Enterprise Logic: Log telemetry data to a private database or trigger custom inventory management scripts when a specific filament roll is used.
Currently, the project is moving toward a modular "Plug-and-Play" hook system. You can define a Python function and map it to a PCE command:
#  Example of a custom Home Assistant hook
class CheckVentilationHandler(UserHandler):

    def call(self, context: UserHandlerContext, *args, **kwargs) -> UserHandlerResult:
        status = home_assistant.get_state("binary_sensor.window")
        if status != "opened":
            return UserHandlerResult.FAILED
        return UserHandlerResult.SUCCESS
In your G-code, you simply call your custom logic:
; PCE-WAIT: check_ventilation()
M0 Waiting for ventilation to open...We are actively working on making the project even more flexible:
- Dynamic Hook Loading: Hooks for other python modules to automatically register new
PCEcommands. - MQTT Support: Native support for broadcasting printer states to MQTT brokers for easy dashboarding.
- Webhooks: Trigger generic HTTP POST requests without writing a single line of Python.
- Spaghetti Detection: Add a handler which runs the Obico/Spaghetti Detector model. The model seems to be available on the net.
- Some way to send notifications to Prusa Connect or directly to user
- Cancel prints instead of keeping them paused
- Support PrusaLink (M0 probably won't work here)
- Support Octoprint (can probably resolve all limitations)