(日本語の説明は下部をご覧ください / Japanese version below)
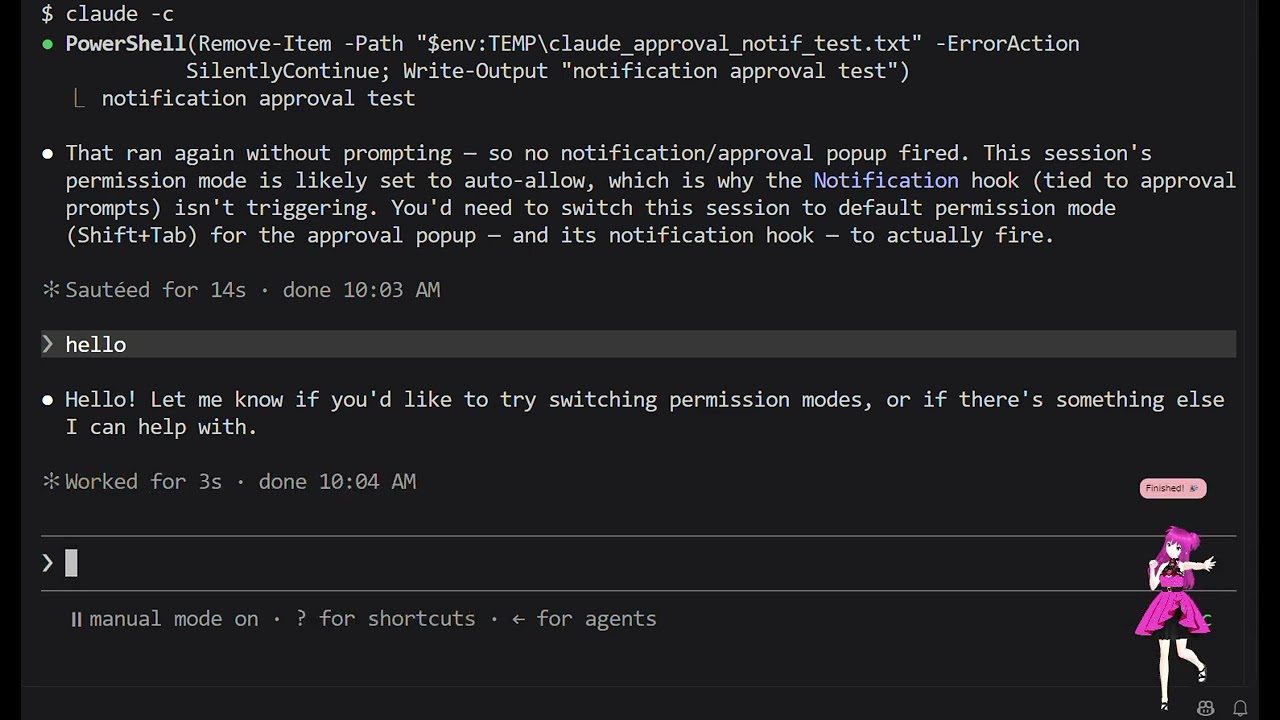
Notification Avatar is a free desktop companion app — your VRoid (VRM) avatar pops up in the corner of your screen and reacts whenever Claude Code or Codex needs your attention or finishes a task, with a speech bubble and a cute animation. Works even when VS Code isn't open, since it reacts to Claude Code/Codex CLI hooks directly. 🥰
Notification Avatar is a spin-off of AI Avatar. AI Avatar is a free app where your VRoid (VRM) avatar cheers you with all its might. Lives in your VS Code sidebar or browser side panel.
Jump to: ✨ Features · 📖 Details · 🗺️ Roadmap
Click for the YouTube demo ↓
🛒 Download from GitHub Releases
- 🔔 Reacts to Claude Code or Codex hooks — pops up on approval-needed and task-finished events from either tool, with a different speech-bubble message for each
- 💃 Cute animation — nod, smile, and a random cute pose on every appearance
- 🚦 Color-coded speech bubble — red for
Stop(task finished), yellow forNotification(needs your approval), so you can tell which one fired at a glance - ⏱️ Auto fade — fades out a few seconds after appearing
- 🔁 Change Avatar — swap the VRM character anytime from the system tray
- 🌐 Language toggle — switch speech-bubble messages between EN and JP from the tray menu
- 🚀 Launch at startup — toggle auto-start at login from the tray menu
- Download
Notification-Avatar-win.zipfrom GitHub Releases (not "Source code") - Extract all and double-click
Notification Avatar.exe— no installation needed - If Windows SmartScreen warns you, click More info → Run anyway (the app is safe but not yet code-signed)
- The app starts in the system tray — you won't see a window until an avatar reaction pops up
Both Claude Code and Codex work — pick the section for your tool and setup below. Each just writes a small trigger file the app watches; requires Node.js to be installed. If Claude Code or Codex itself runs inside WSL2, use the WSL2 variant (node.exe instead of node) — otherwise the hook would write to WSL2's own home directory instead of the Windows one this app watches. The WSL2 variant needs Node.js for Windows specifically (not just WSL2's own Node) installed and on the Windows PATH, so node.exe resolves via WSL2's interop.
Add this to your ~/.claude/settings.json (or a project's .claude/settings.json):
{
  "hooks": {
    "Notification": [
      {
        "matcher": "",
        "hooks": [
          {
            "type": "command",
            "command": "node -e \"require('fs').writeFileSync(require('path').join(require('os').homedir(),'.claude','notification-avatar-trigger.json'), JSON.stringify({event:'notification',timestamp:Date.now()}))\""
          }
        ]
      }
    ],
    "Stop": [
      {
        "matcher": "",
        "hooks": [
          {
            "type": "command",
            "command": "node -e \"require('fs').writeFileSync(require('path').join(require('os').homedir(),'.claude','notification-avatar-trigger.json'), JSON.stringify({event:'stop',timestamp:Date.now()}))\""
          }
        ]
      }
    ]
  }
}Same file, same JSON — just call node.exe instead of node so it's the Windows-side Node.js writing to the Windows-side trigger file (not WSL2's own ~/.claude):
{
  "hooks": {
    "Notification": [
      {
        "matcher": "",
        "hooks": [
          {
            "type": "command",
            "command": "node.exe -e \"require('fs').writeFileSync(require('path').join(require('os').homedir(),'.claude','notification-avatar-trigger.json'), JSON.stringify({event:'notification',timestamp:Date.now()}))\""
          }
        ]
      }
    ],
    "Stop": [
      {
        "matcher": "",
        "hooks": [
          {
            "type": "command",
            "command": "node.exe -e \"require('fs').writeFileSync(require('path').join(require('os').homedir(),'.claude','notification-avatar-trigger.json'), JSON.stringify({event:'stop',timestamp:Date.now()}))\""
          }
        ]
      }
    ]
  }
}
Codex needs two separate mechanisms for the same coverage — notify fires when a response finishes (maps to Stop), hooks.PermissionRequest fires on an approval prompt (maps to Notification). Add this to your user-level ~/.codex/config.toml:
notify = ["node", "-e", "require('fs').writeFileSync(require('path').join(require('os').homedir(),'.claude','notification-avatar-trigger.json'), JSON.stringify({event:'stop',timestamp:Date.now()}))"]

[[hooks.PermissionRequest]]
matcher = ""

[[hooks.PermissionRequest.hooks]]
type = "command"
command = "node -e \"require('fs').writeFileSync(require('path').join(require('os').homedir(),'.claude','notification-avatar-trigger.json'), JSON.stringify({event:'notification',timestamp:Date.now()}))\""
Restart Codex for the config change to take effect — config.toml is only read at startup. If you already have a config.toml, put the notify = [...] line at the very top of the file — putting it below other settings can make it silently stop working.
Same as above, with node.exe instead of node:
notify = ["node.exe", "-e", "require('fs').writeFileSync(require('path').join(require('os').homedir(),'.claude','notification-avatar-trigger.json'), JSON.stringify({event:'stop',timestamp:Date.now()}))"]

[[hooks.PermissionRequest]]
matcher = ""

[[hooks.PermissionRequest.hooks]]
type = "command"
command = "node.exe -e \"require('fs').writeFileSync(require('path').join(require('os').homedir(),'.claude','notification-avatar-trigger.json'), JSON.stringify({event:'notification',timestamp:Date.now()}))\""
Restart Codex for the config change to take effect, and keep notify = [...] at the very top of the file, same as above.
That's it — the app watches ~/.claude/notification-avatar-trigger.json and pops up whenever any of the hooks above writes to it.
This is the same Claude Code/Codex hook mechanism used by our fully open-source claude-code-codex-notification — a tiny, dependency-free script version with no avatar. Check that repo if you want to see exactly how hook-triggered notifications work, with nothing hidden.
Right-click the tray icon → Change Avatar → select any .vrm file. Your choice is saved automatically and restored on next launch. If you move the .vrm file, select it again from the tray.
You can create your own 3D avatar for free using VRoid — no 3D modeling skills needed. Design your character and export it as a .vrm file.
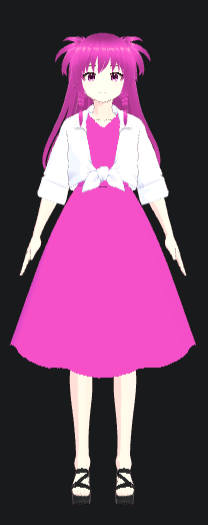
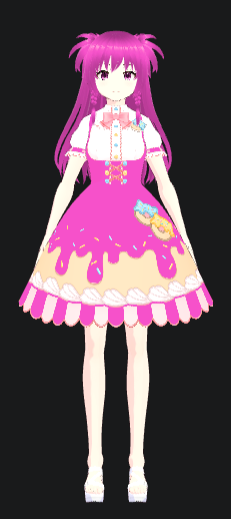
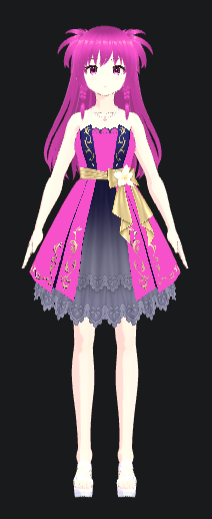
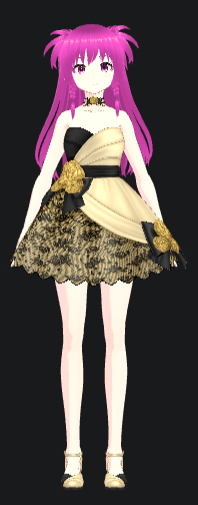
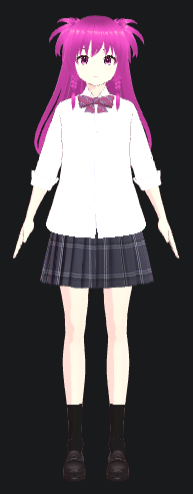
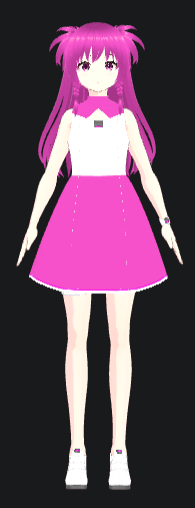
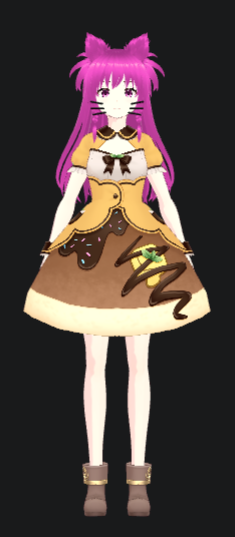
Or use the Candy Pink sample avatar — a kind and cheerful girl. Good at making fake smiles.
| v2 | v3 | v4 | v5 | v6 | v7 | v8 cat |
|---|---|---|---|---|---|---|
 |
 |
 |
 |
 |
 |
 |
👉 Download Candy Pink from GitHub
Right-click the tray icon → Language: EN to switch to JP, or Language: JP to switch back to EN.
Speech bubble messages will show in the selected language. The setting is saved automatically and restored on next launch.
Right-click the tray icon → Launch at Startup: ON/OFF to toggle. When ON, Notification Avatar starts automatically when you log in to Windows.
If you move the
.exe, toggle Launch at Startup OFF then ON again to re-register the new location.
Right-click the tray icon → Quit.
v1 ✅
- 🎉 Notification Avatar initial release!
v2 — Now creating!
- 🍎 Mac support
- Other fun updates!
Notification Avatar は無料のデスクトップ companion アプリです。Claude CodeまたはCodexがあなたの入力を必要としたとき、またはタスクを完了したときに、画面の隅に VRoid(VRM)アバターが現れ、吹き出しとかわいいアニメーションでお知らせしてくれます。VS Code を開いていなくても、Claude Code/Codex CLI のフックに直接反応するので動作します。🥰
Notification Avatar は AI Avatar のスピンオフ。AI AvatarはVRoid(VRM)アバターが全力で応援してくれる無料アプリ。VS Code サイドバーやブラウザのサイドパネルで動作します。
Click for the YouTube demo ↓
- 🔔 Claude CodeまたはCodexのフックに反応 — どちらのツールでも、承認待ち・タスク完了のイベントで出現し、それぞれ異なる吹き出しメッセージを表示
- 💃 かわいいアニメーション — 出現のたびにうなずき・笑顔・ランダムポーズを再生
- 🚦 吹き出しを色分け表示 —
Stop(タスク完了)は赤、Notification(承認待ち)は黄色で、ひと目でどちらか分かる - ⏱️ 自動フェード — 数秒後に自動でフェードアウト
- 🔁 アバター変更 — システムトレイからいつでも VRM キャラを変更可能
- 🌐 言語切替 — トレイメニューから吹き出しメッセージを EN/JP で切り替え
- 🚀 自動起動 — トレイメニューからログイン時の自動起動をトグル
- GitHub Releases から
Notification-Avatar-win.zipをダウンロード ("Source code" ではなく) - すべて展開して
Notification Avatar.exeをダブルクリック — インストール不要 - Windows SmartScreen の警告が出た場合は 詳細情報 → 実行 をクリック(コード署名未対応ですが安全です)
- アプリがシステムトレイに常駐します — アバターのリアクションが出るまでウィンドウは表示されません
Claude CodeとCodexのどちらでも動作します — お使いのツールと環境のセクションを選んでください。どちらも、アプリが監視する小さなトリガーファイルを書き出すだけです。Node.jsがインストールされている必要があります。Claude CodeやCodex自体がWSL2内で動いている場合はWSL2版(node の代わりに node.exe)を使ってください — そうしないとフックがWSL2自身のホームディレクトリに書き込んでしまい、このアプリが監視しているWindows側のファイルに届きません。WSL2版では、node.exe がWSL2のinterop経由で見つかるように、Windows版のNode.js(WSL2自身のNodeだけでは不可)がインストールされ、WindowsのPATHに通っている必要があります。
~/.claude/settings.json(またはプロジェクトの .claude/settings.json)に以下を追加してください:
{
  "hooks": {
    "Notification": [
      {
        "matcher": "",
        "hooks": [
          {
            "type": "command",
            "command": "node -e \"require('fs').writeFileSync(require('path').join(require('os').homedir(),'.claude','notification-avatar-trigger.json'), JSON.stringify({event:'notification',timestamp:Date.now()}))\""
          }
        ]
      }
    ],
    "Stop": [
      {
        "matcher": "",
        "hooks": [
          {
            "type": "command",
            "command": "node -e \"require('fs').writeFileSync(require('path').join(require('os').homedir(),'.claude','notification-avatar-trigger.json'), JSON.stringify({event:'stop',timestamp:Date.now()}))\""
          }
        ]
      }
    ]
  }
}同じファイル、同じJSONです — node の代わりに node.exe を呼ぶだけで、Windows側のNode.jsがWindows側のトリガーファイルに書き込むようになります(WSL2自身の ~/.claude ではなく):
{
  "hooks": {
    "Notification": [
      {
        "matcher": "",
        "hooks": [
          {
            "type": "command",
            "command": "node.exe -e \"require('fs').writeFileSync(require('path').join(require('os').homedir(),'.claude','notification-avatar-trigger.json'), JSON.stringify({event:'notification',timestamp:Date.now()}))\""
          }
        ]
      }
    ],
    "Stop": [
      {
        "matcher": "",
        "hooks": [
          {
            "type": "command",
            "command": "node.exe -e \"require('fs').writeFileSync(require('path').join(require('os').homedir(),'.claude','notification-avatar-trigger.json'), JSON.stringify({event:'stop',timestamp:Date.now()}))\""
          }
        ]
      }
    ]
  }
}Codexでは同じカバレッジを得るために2つの仕組みが必要です — notify は応答完了時(Stop に相当)、hooks.PermissionRequest は承認プロンプト表示時(Notification に相当)に発火します。ユーザーレベルの ~/.codex/config.toml に以下を追加してください:
notify = ["node", "-e", "require('fs').writeFileSync(require('path').join(require('os').homedir(),'.claude','notification-avatar-trigger.json'), JSON.stringify({event:'stop',timestamp:Date.now()}))"]

[[hooks.PermissionRequest]]
matcher = ""

[[hooks.PermissionRequest.hooks]]
type = "command"
command = "node -e \"require('fs').writeFileSync(require('path').join(require('os').homedir(),'.claude','notification-avatar-trigger.json'), JSON.stringify({event:'notification',timestamp:Date.now()}))\""
設定を反映させるにはCodexを再起動してください — config.toml は起動時にのみ読み込まれます。すでに config.toml がある場合、notify = [...] の行はファイルの一番上に置いてください — 他の設定より下に置くと、サイレントに動かなくなることがあります。
上と同じ内容で、node の代わりに node.exe を使います:
notify = ["node.exe", "-e", "require('fs').writeFileSync(require('path').join(require('os').homedir(),'.claude','notification-avatar-trigger.json'), JSON.stringify({event:'stop',timestamp:Date.now()}))"]

[[hooks.PermissionRequest]]
matcher = ""

[[hooks.PermissionRequest.hooks]]
type = "command"
command = "node.exe -e \"require('fs').writeFileSync(require('path').join(require('os').homedir(),'.claude','notification-avatar-trigger.json'), JSON.stringify({event:'notification',timestamp:Date.now()}))\""設定を反映させるにはCodexを再起動してください。notify = [...] をファイルの一番上に置くのも上記と同様です。
これだけです — アプリは ~/.claude/notification-avatar-trigger.json を監視し、上記いずれかのフックが書き込むたびに出現します。
これはClaude Code/Codexのフックの仕組みとして、完全オープンソースの claude-code-codex-notification と同じものです — アバターなしの、依存関係ゼロの小さなスクリプト版です。フックによる通知がどう動いているか、隠すことなくそのまま確認したい方はそちらのリポジトリをご覧ください。
トレイアイコンを右クリック → Change Avatar → .vrm ファイルを選択。選択したアバターは自動保存され、次回起動時に復元されます。.vrm ファイルを移動した場合は、トレイから再度選択してください。
VRoid を使えば3Dモデリングの知識なしに無料でオリジナルアバターを作れます。キャラクターをデザインして .vrm ファイルとしてエクスポートしてください。
サンプルアバター Candy Pink もご利用いただけます — 優しく明るい女の子。作り笑いが得意。
| v2 | v3 | v4 | v5 | v6 | v7 | v8 cat |
|---|---|---|---|---|---|---|
|
|
|
|
|
|
|
👉 Candy Pink を GitHub からダウンロード
トレイアイコンを右クリック → Language: EN で JP に切り替え、Language: JP で EN に戻します。
選択した言語で吹き出しメッセージが表示されます。設定は自動保存され、次回起動時に復元されます。
トレイアイコンを右クリック → Launch at Startup: ON/OFF でトグル。ON のとき、ログイン時に Notification Avatar が自動で起動します。
.exeを移動した場合は、Launch at Startup を一度 OFF にしてから ON に戻すと再登録されます。
トレイアイコンを右クリック → Quit
v1 ✅
- 🎉 Notification Avatar 初回リリース!
v2 — 作成中!
- 🍎 Mac 対応
- 他の楽しいアップデート!